• Projects
  • About
  • UX
  • UI Design
  • Web Dev
  • Interaction Design
  • Creative Coding
  • Illustration
  • Blog
  • Menu

MANXUE WANG

  • Projects
  • About
  • UX
  • UI Design
  • Web Dev
  • Interaction Design
  • Creative Coding
  • Illustration
  • Blog
102.jpg

Week5 Assignment- Intro to Fabrication

December 08, 2014 in Intro to Fabrication

  [embed]https://vimeo.com/113942348[/embed]

This week, we learned distinguish different materials and fasteners, we should use two materials to make our works this week.

I want to make a colorful button box for my PCOM project- something like color palette to let user to choose color they want.

At first, I want to use colorful buttons to make the box, but it's difficult to find push button in 7 different colors. Then I thought about putting colorful acrylic board on the button top to represent different colors, and I asked ben, he said it's not a good idea because users may press acrylic board in different corners and the force out of balance may cause the button nondurable. Therefore, I decided to put buttons and acrylic board in different location, avoid them to affect each other, and put them in parallel to show each button represent specific color.

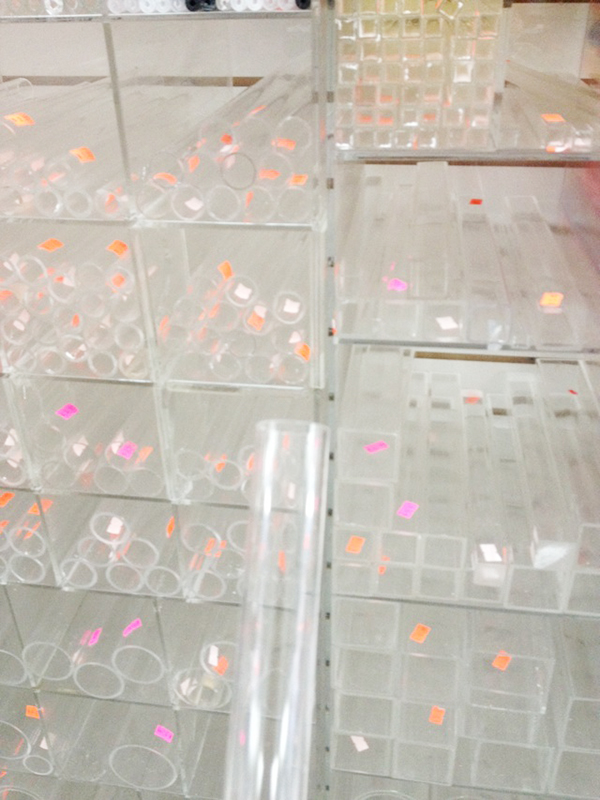
I bought colorful acrylic board from canal plastic center, I hesitated to buy transparent one or static one, then I decided to put some LED under the transparent Acrylic board which can show if users has pressed it successfully.

3 4


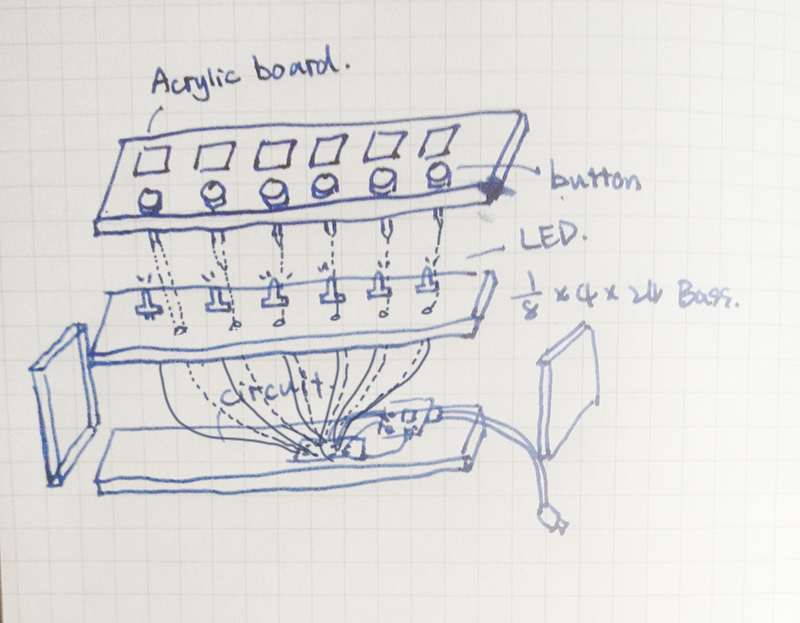
I designed box at first,  use three layers to build these box (or color palette). First layer  is the 5*24*1/4 pine wood board to set acrylic board and buttons, second layer is 4*24*1/8 basswood board(leave 0.5inch each side to put front and back board which the thick is 0.5 inch) and put super LEDs on it , and the third layer is a piece of 4*24*0.5 pine wood(use the same wood with front and back board in this box.). This layer is to contain all circuit, breadboard, and Arduino board.

1

2


First, I used laser cutter to make hole to put buttons and acrylic board. the acrylic board is 2*2, and the smallest diameter of button is 0.62inch , so I leave the acrylic hole to 1.9*1.9 square, button hole is  o.64inch diameter circle

7586FEA3-7034-4C9C-92CE-26524C63EF5D


Second, I used Super glue to attach acrylic board on the pine wood (no plastic glue and wood glue, they didn't work in this case) , and put seven buttons on the board. Forgot to take photos in process..


Third, I drilled two row of small holes in parallel, one is to put LED in it, and one is to put buttons' wires through it.

710


IMG_6409_1Fourth, put all the circuit in the third layer.

Fifth, I used Mad saw to cut the front  and back wood for the box.

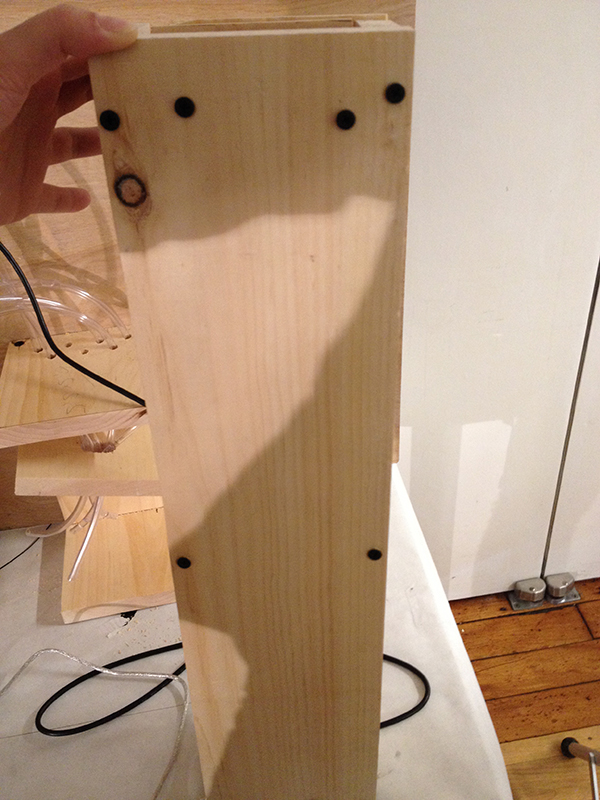
Sixth, put wood glue on wood board's each side , arrange them together, use  clamp to make them attach in tightness.Then, used  fasteners to attach piece of wood board together, make the box easy to change and fix in the future.

6 2


Here it is!

9


Comment
121.jpg

Taste your drawing

December 07, 2014 in Intro to Computational media, Intro to Physical Computing

  [embed]https://vimeo.com/113808452[/embed]

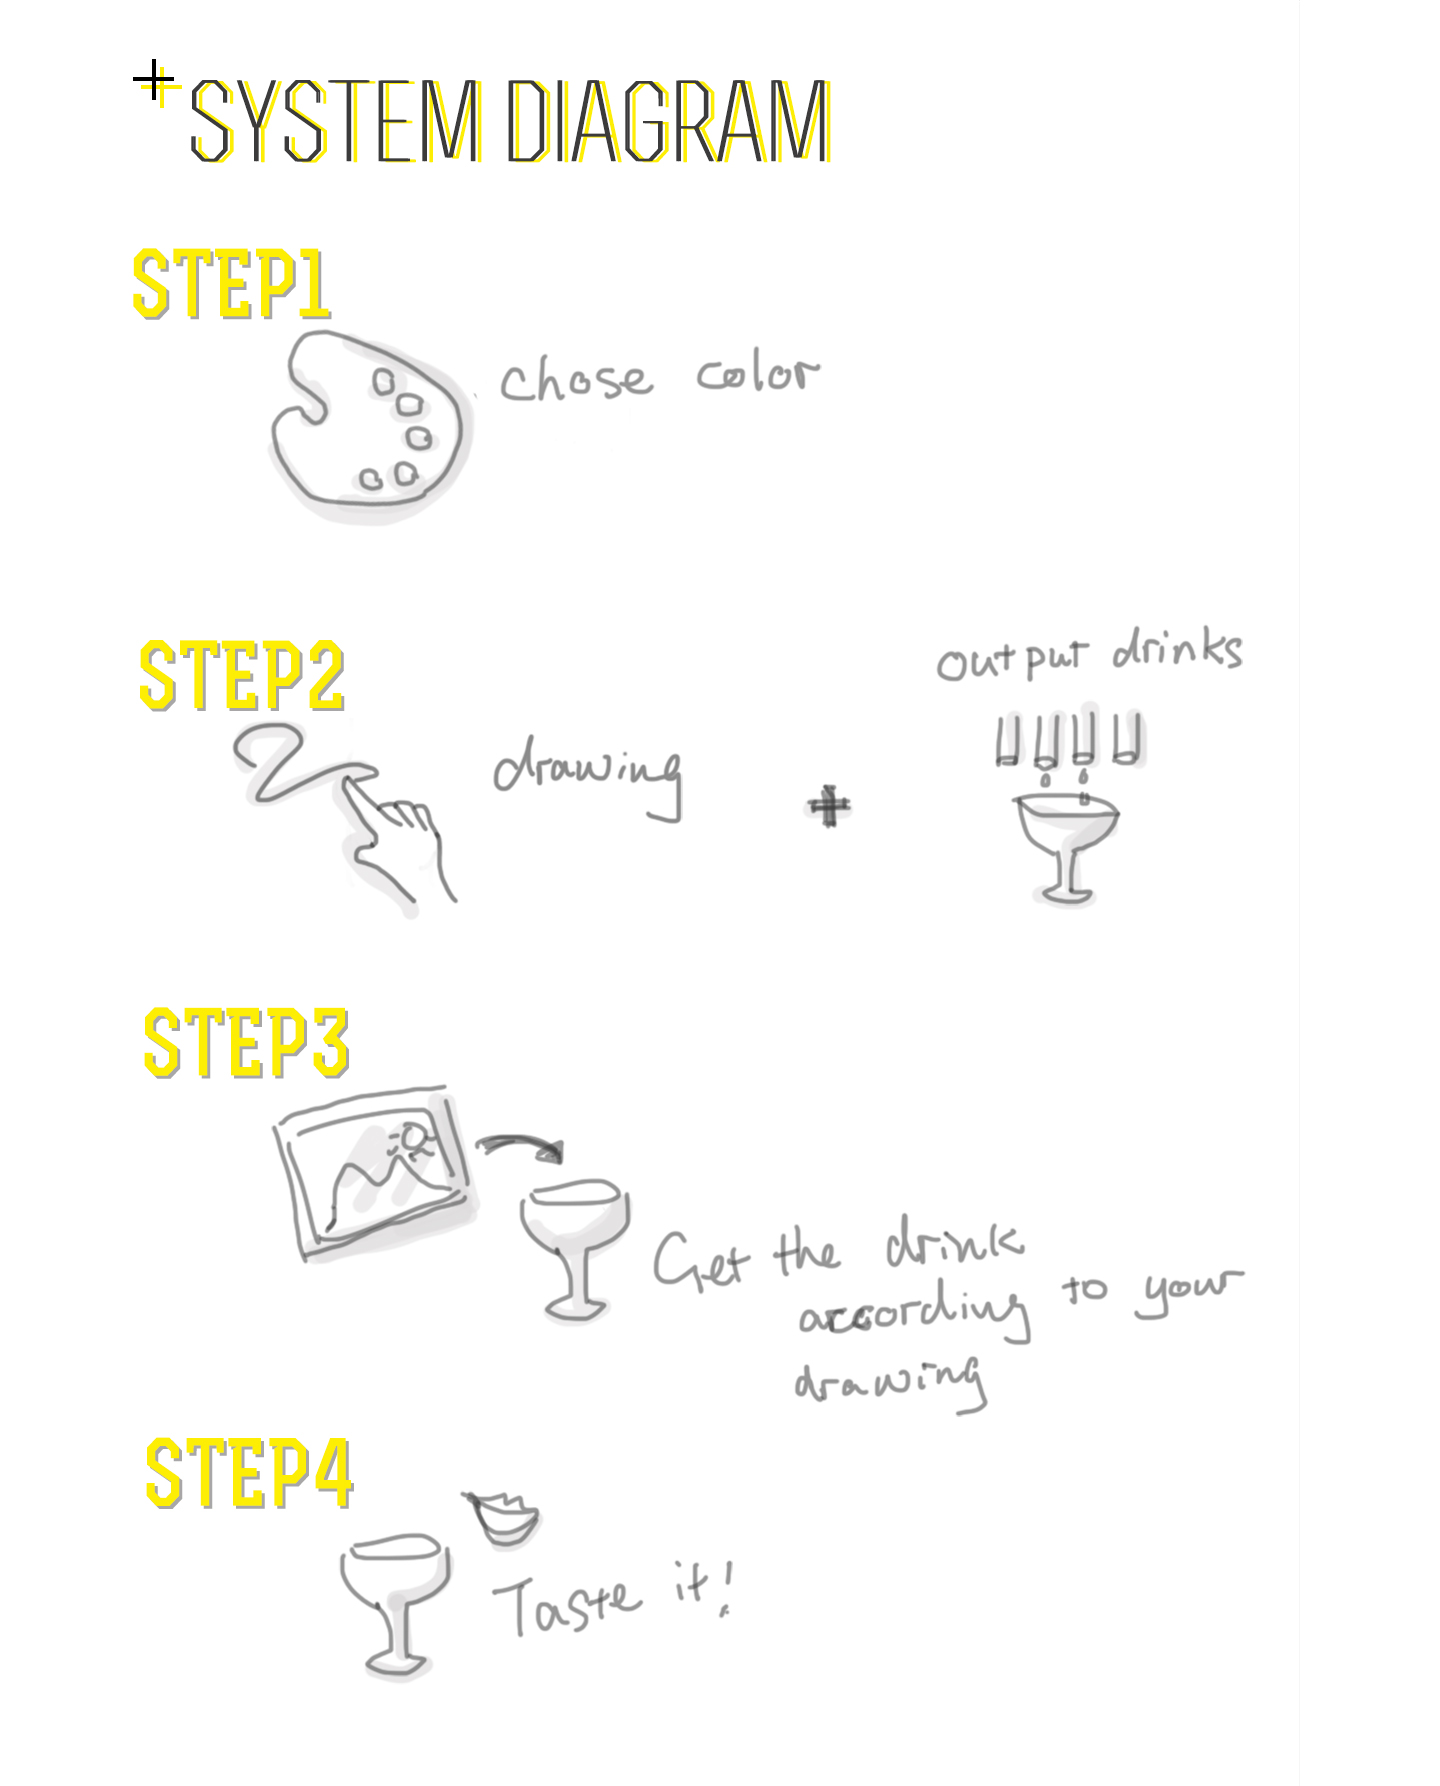
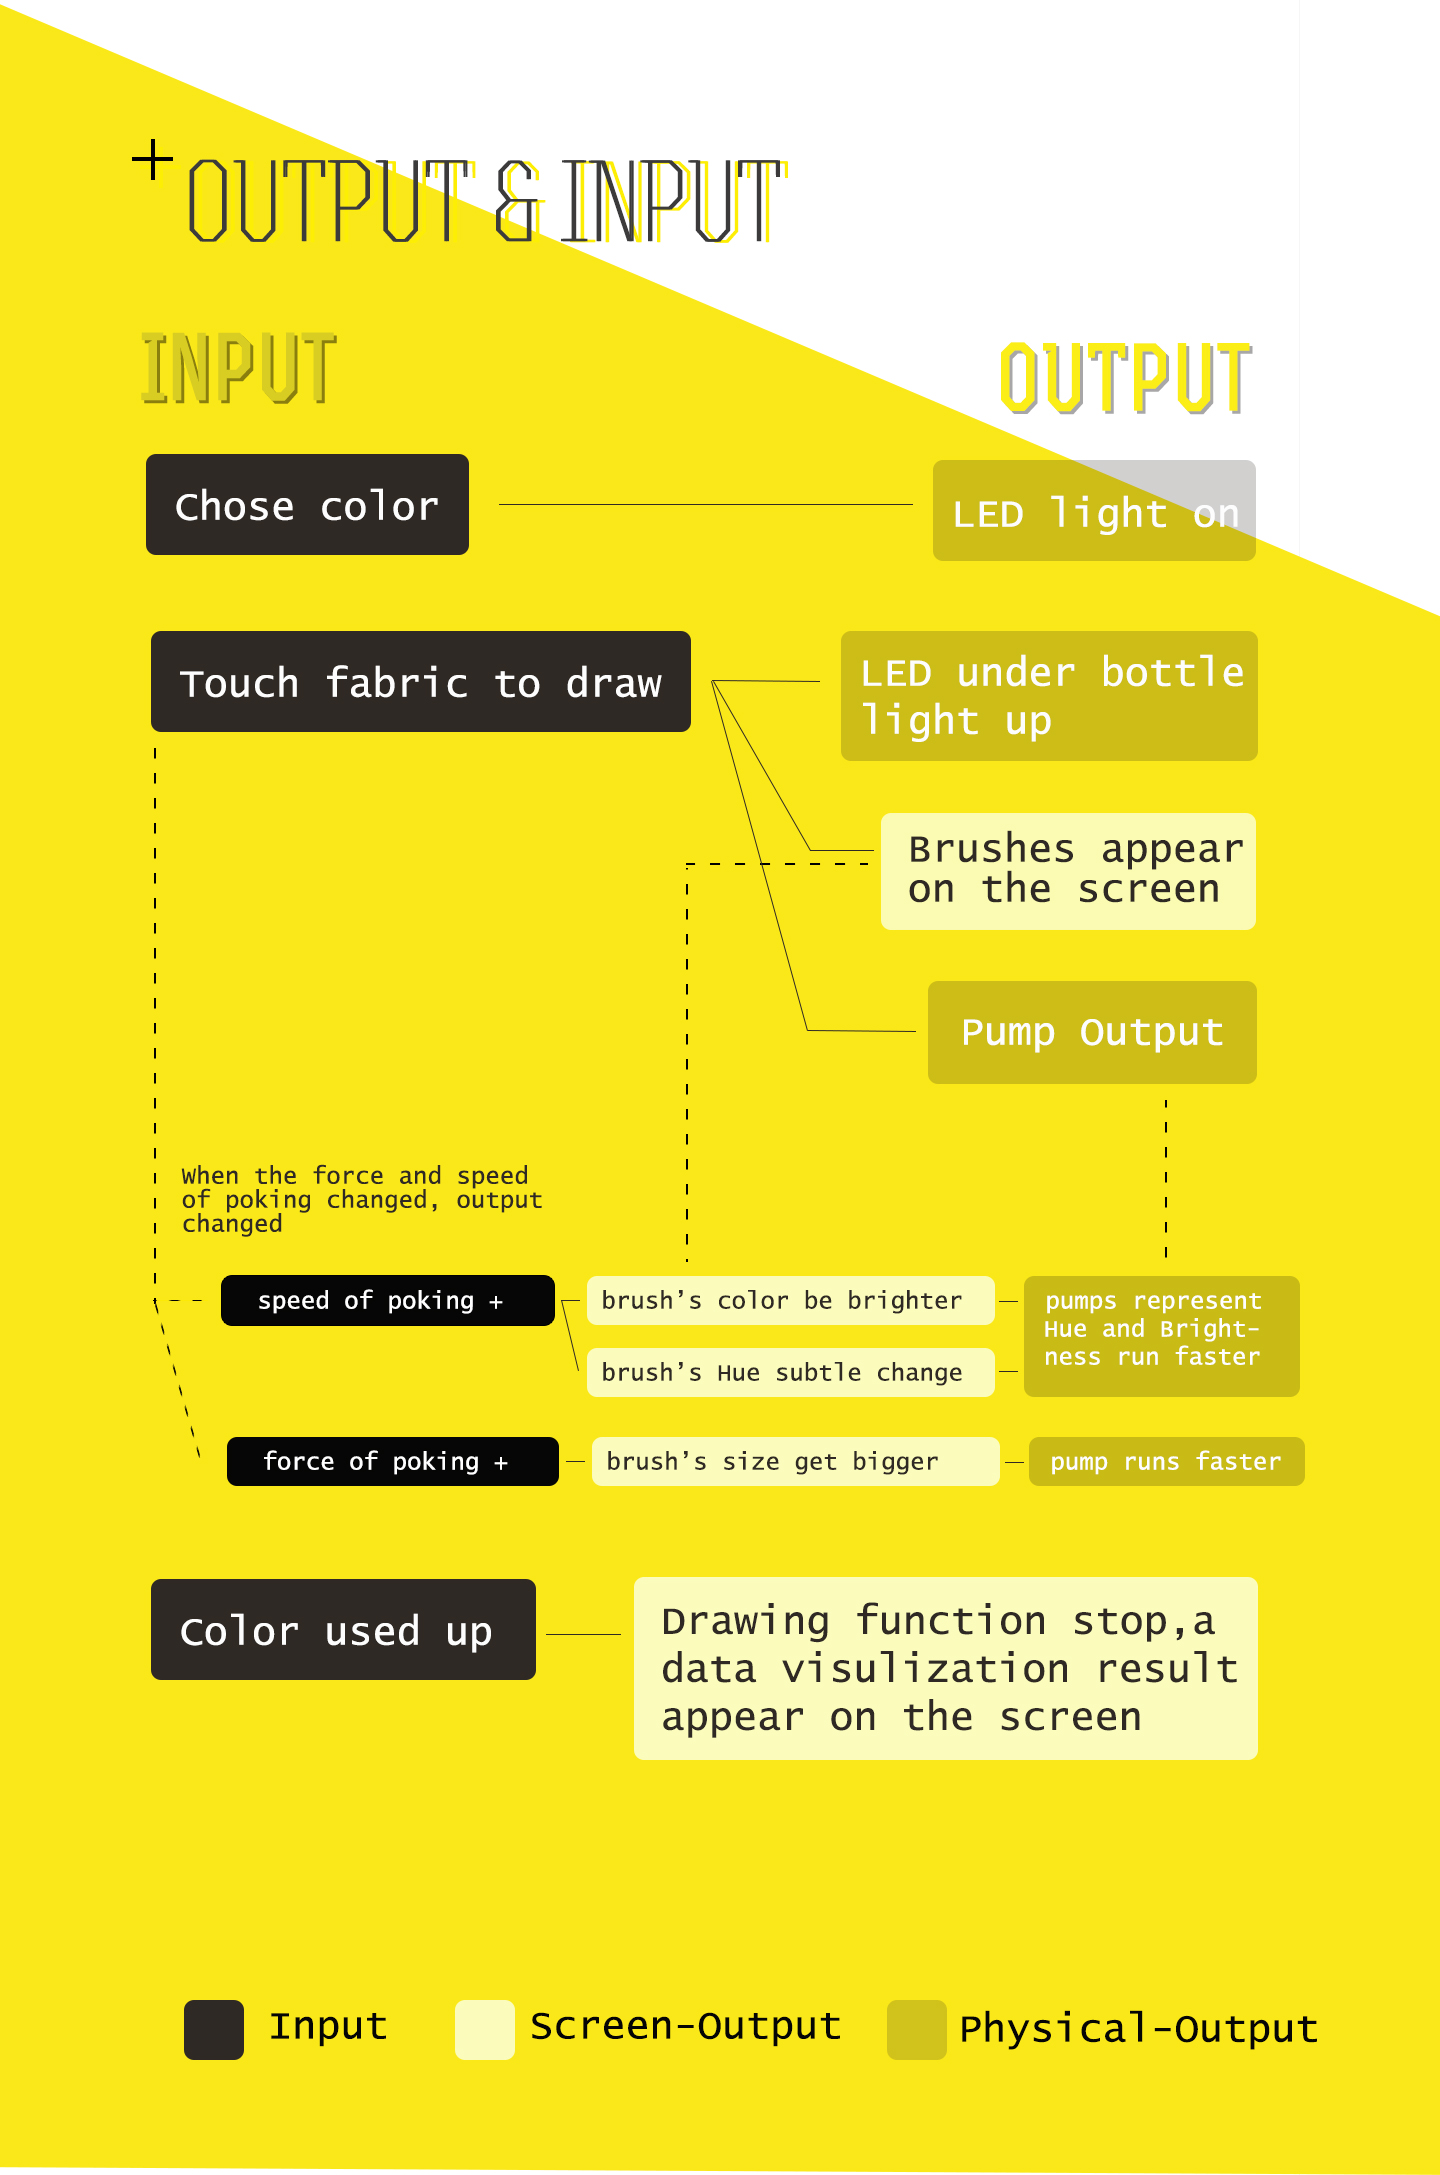
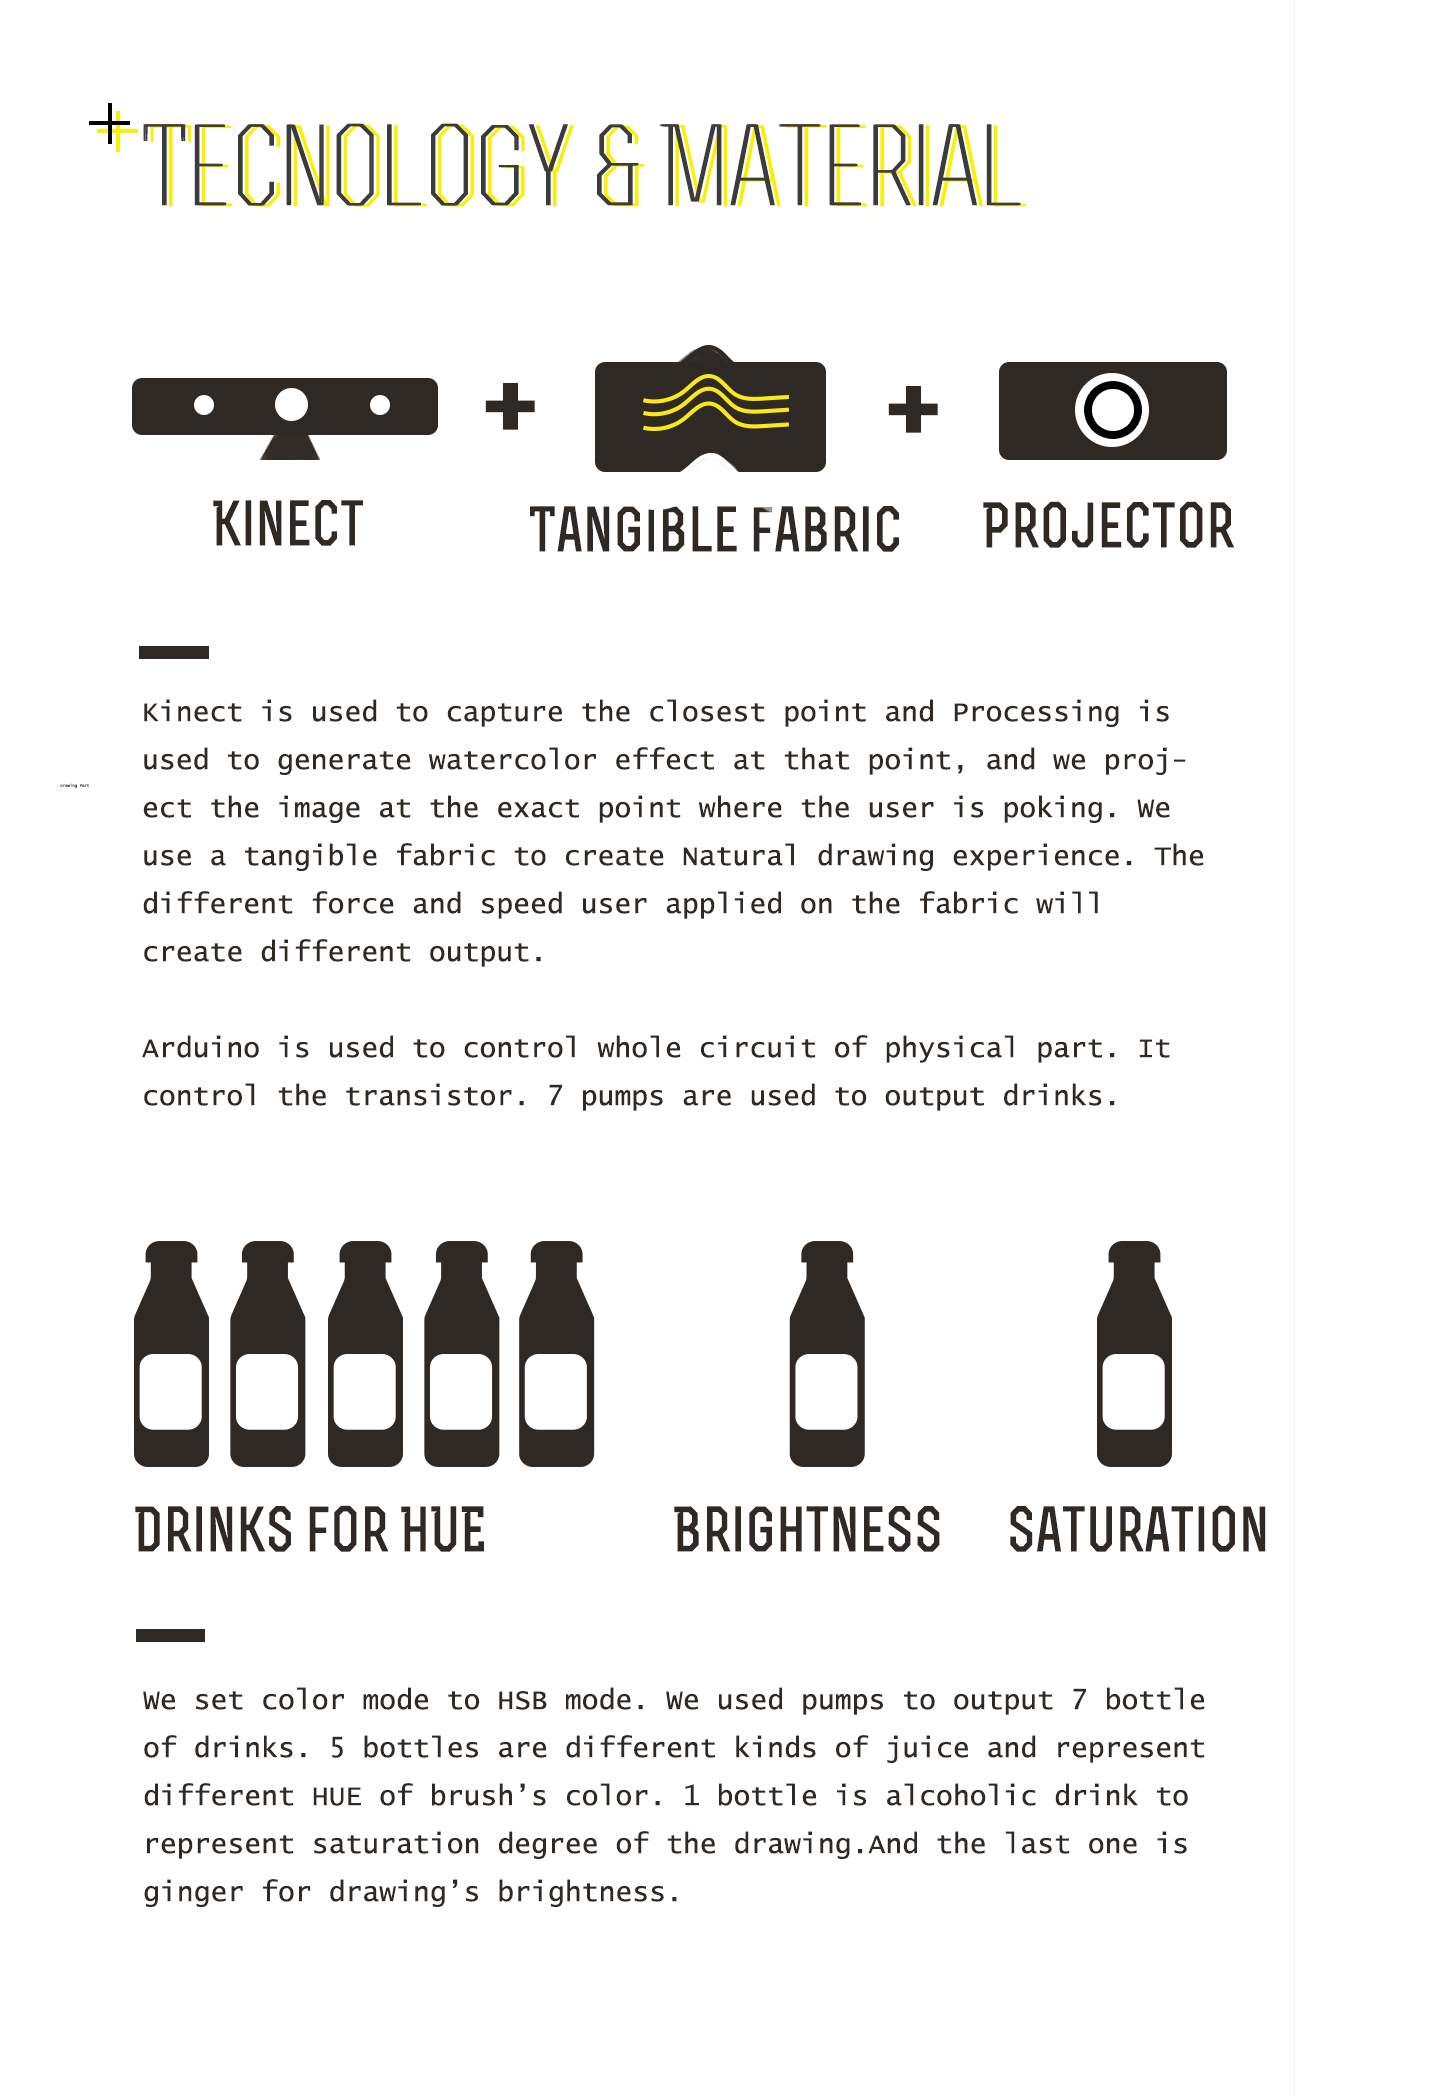
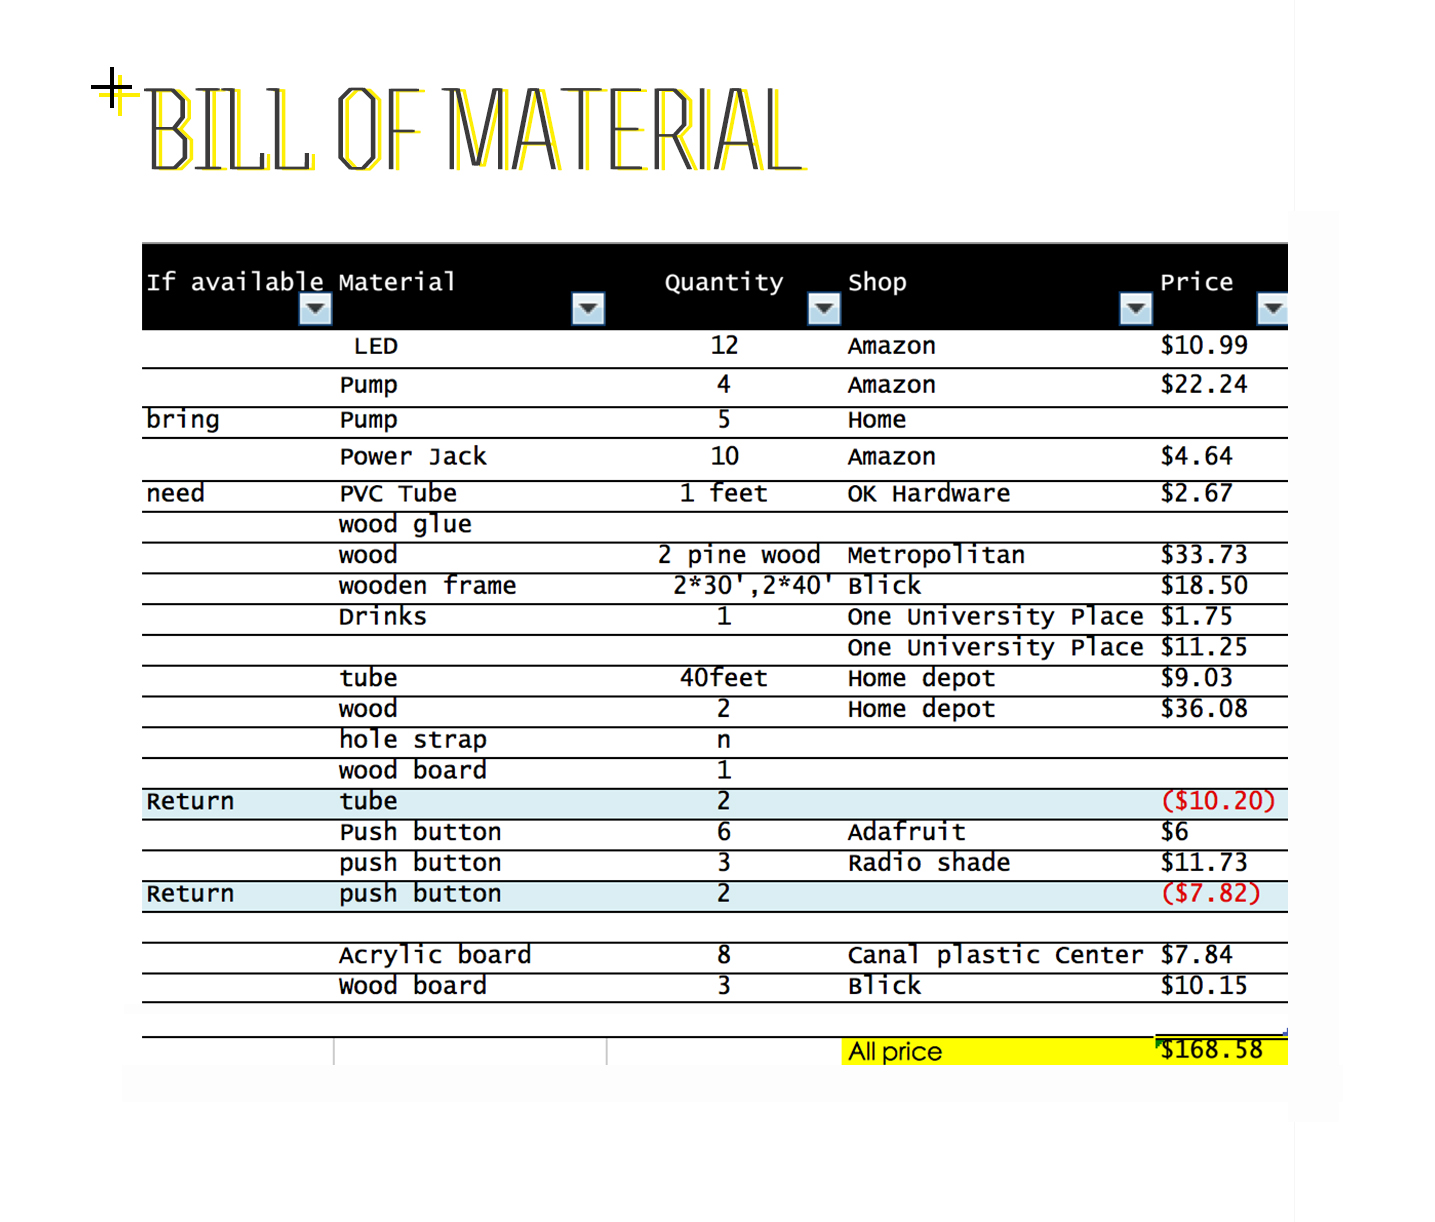
1INTRO2SYSTEM DIAGRAM3UTPUT4TECH5bom

Related post

Project Proposal: ICM and PCOM Final proposal

Input part documentary:ICM Final Documentary

More Project Process: Fabrication process

Comment
82.jpg

Week4 Enclosure-Intro to Fabrication

November 27, 2014 in Intro to Fabrication

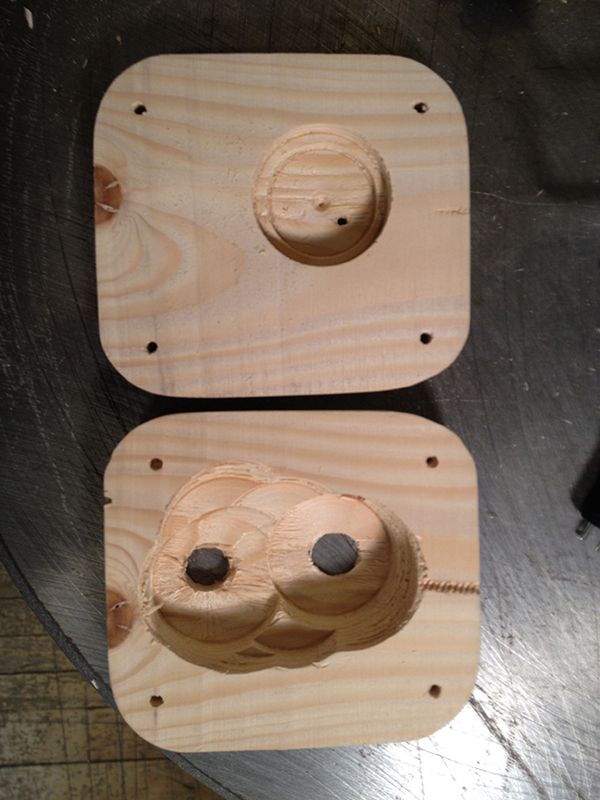
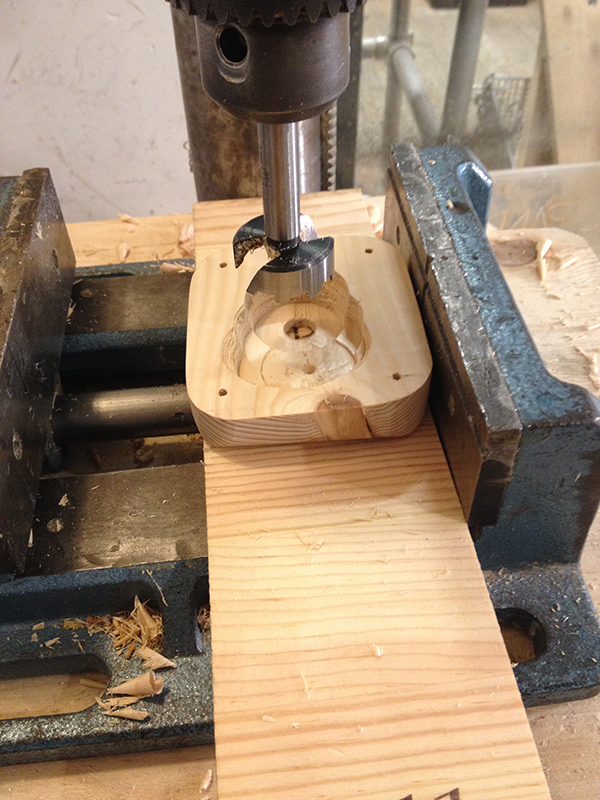
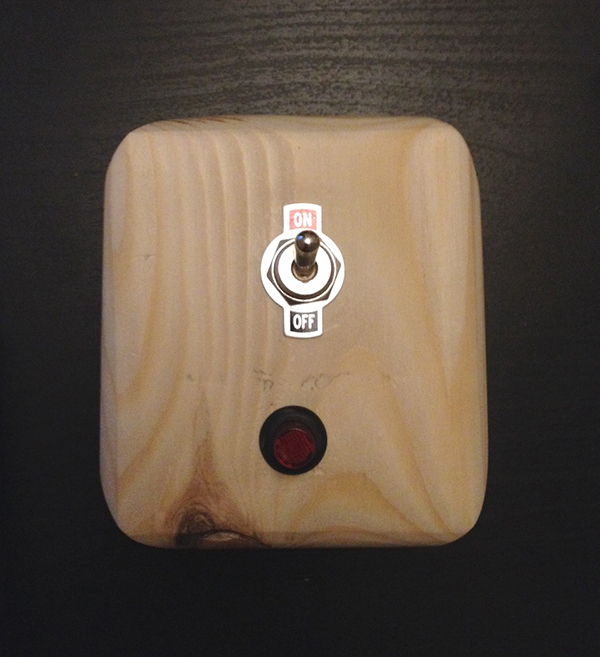
IMG_6305 This week we learned how to make an enclosure for the project, How to make it easy to open, easy to  repairs, change batteries, and easy to modify. I make a wood enclosure for the assignment.

I used

a piece of Basswood*1

Toggle switch *1

Illuminated pushbutton switch *1


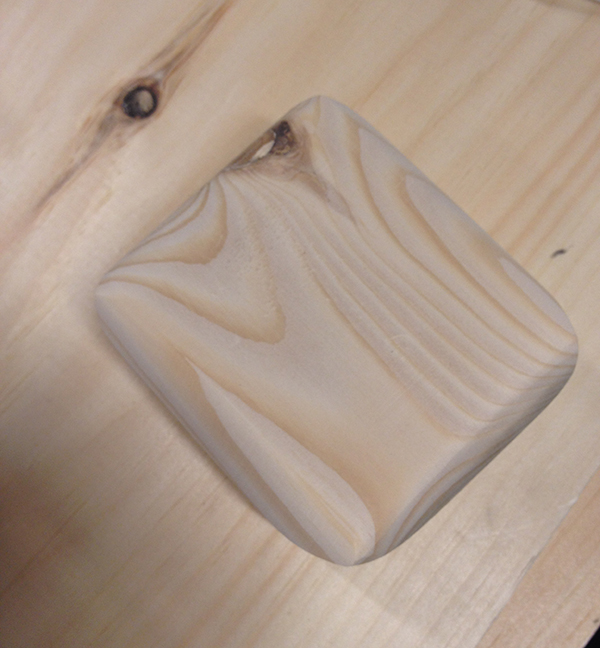
First,I picked a piece of bass wood in the shop

and rounder it in a nice shape

IMG_6295


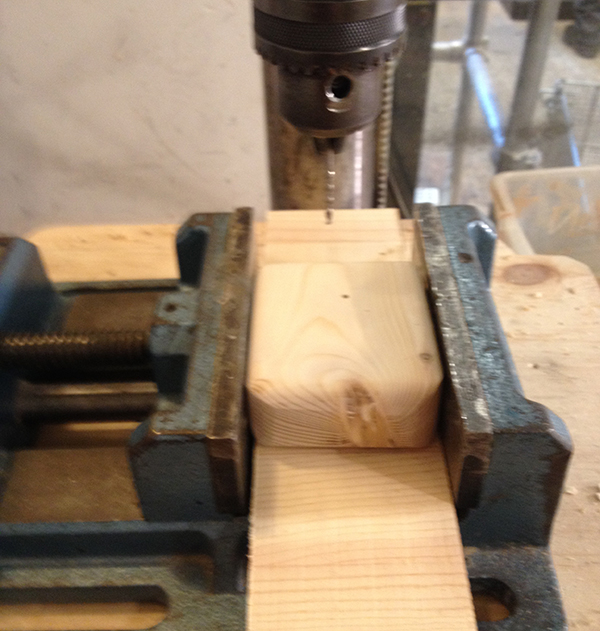
2.Then I drilled 4 hole in the corner by the drill press.

IMG_6296


IMG_6297


3. I cut the wood in to two pieces by band saw.

4. Make big holes inside the wood box to make a space to put components in it. I used drill press machine to drill the hole.  I drilled big hole at first, then a small hole to fit the components'  feet.

IMG_6299 IMG_6298 IMG_6300


5. Added components in it.

IMG_6301


6.  Then I put the screw in it to make the two piece of wood attach together

IMG_6304


Here it is..


IMG_6303 IMG_6302

Comment
22.jpg

Week3 Assignment-- Intro to Fabrication

November 14, 2014 in Intro to Fabrication

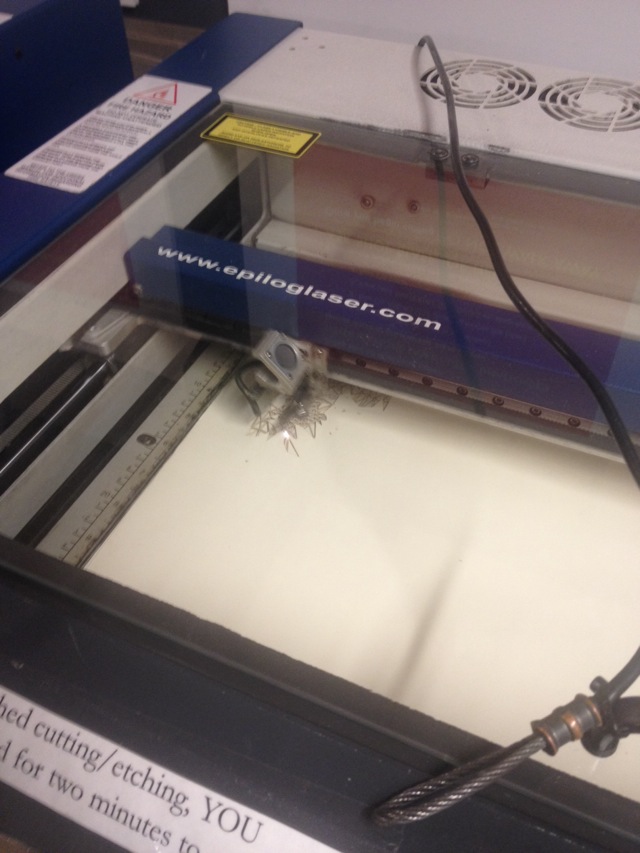
14 This week, we learned how to deal with laser cutter. Using different material may have totally different effect.

I decide to make a candle holder, and I used these things:

Hardcard *1

Craft plywood*1  1/8*6*12

Bass wood*1  3/32*6*24

Rod*1

Candle*1

I go to canal plastic center bought some acrylic, but haven't used it finally.

This is my sketch

IMG_6246


1. Make the cover for Candle holder

First, I tried some patterns in Illustrator, weren't fit very well.

IMG_6238

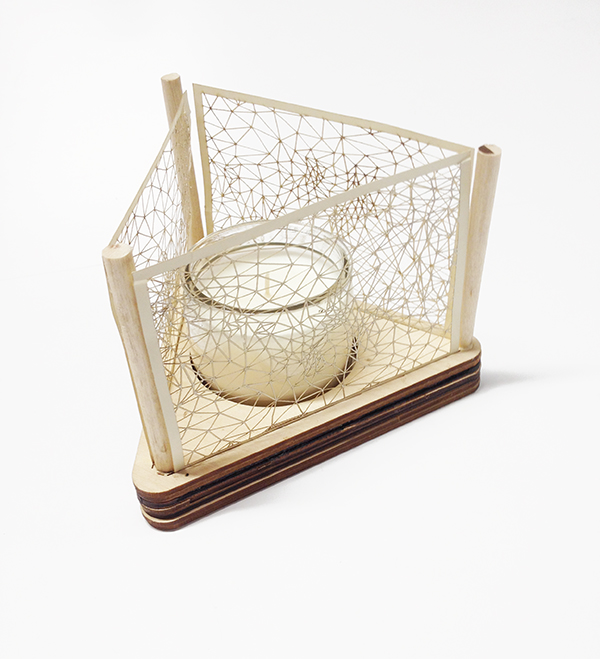
then I want to use some triangles to make it like a net, I don't know if it can work because the net has very thin lines. I find some pictures on website, and arrange them in Illustrator. and just try it on Laser cutter.

32B2A665-A318-418B-BFDE-92C02E442E9A

I change the setting to 76,20,2500, the paper card 's setting should be 66,22,2500, but since the line is so thin, I set speed higher and power lower.

IMG_6239

I for got to take photo of the out put things..

2. Make the holder

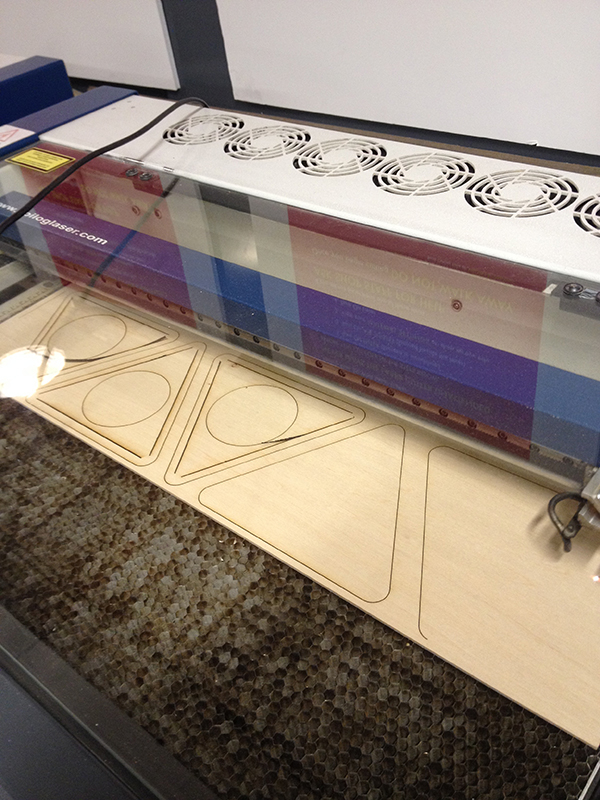
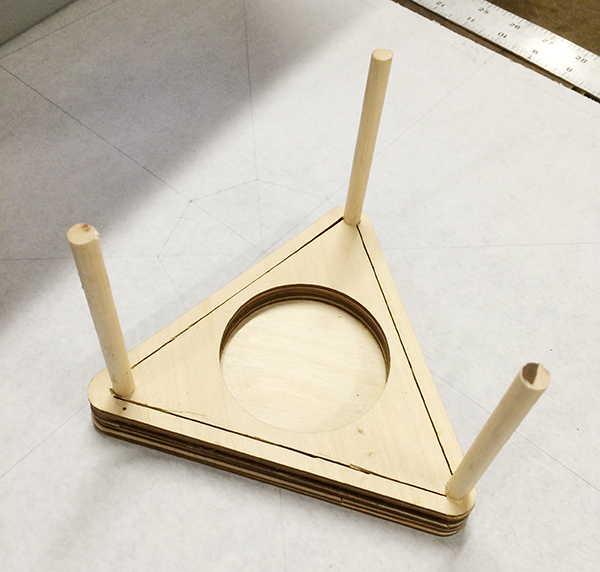
I designed a holder in regular triangle shape, and make a circle in the center (I suppose it have a hole in the triangle to hold the candle) and cut three line near the edge to put paper cover which made before in it. I used wood board to make them. I use bass wood to make 5 holders, and use plywood to make extra 2 of them. (don't use plywood again!! disaster....)

I use 1/8 wood, so I set 30, 60, 100 in Laser cutter according to the reference. but I can't cut successfully in the same set for plywood, so I change the setting to (I can't remember clearly maybe is-)90,90,100 , it has a little fire in laser cut, scary... and the board turn to black...

3D2C7366-945B-4A9F-BF5E-527B1985B87DIMG_6244

3. Install holder

I want to attach holders I cut before together to make it thick, but I didn't align them neatly, so I can't put cover in the hover deeply, because the lines in the edge aren't align well. Next time I should attach each two piece of board together once a time instead attached all of them together once. It's really regretful.

Then i put three rod on it.

IMG_6245 13 152


The cover cannot attach on the rod , I want to make another cover, to attach these three pieces of cover together and not be cut individually. Cause the laser cutter has been booked, maybe I should do it in the future.

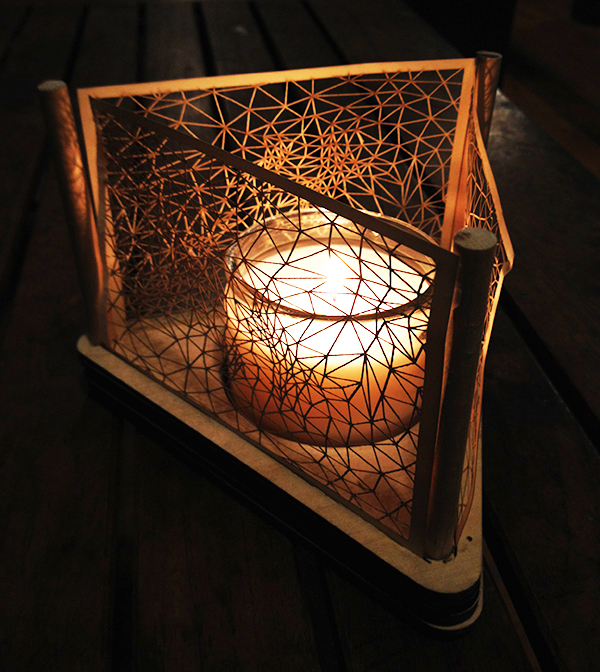
Finally, put candle in it.

1  12

8   57346

It seems like there's a lot of pity things in the process, but the more material you have tried, the more confident and comfortable you'll be when you get well with the machines. Making this candleholder is a good lesson to learn how to deal with laser cutter, and I got more knowledge and experience, hope do better next time, hope align neatly at least...


Comment
52.jpg

Week3 Assignment-Intro to Network Media

November 12, 2014 in Network Media

My webpage is here!

Comment
131.jpg

PCOM&ICM Final proposal

November 11, 2014 in Intro to Computational media, Intro to Physical Computing

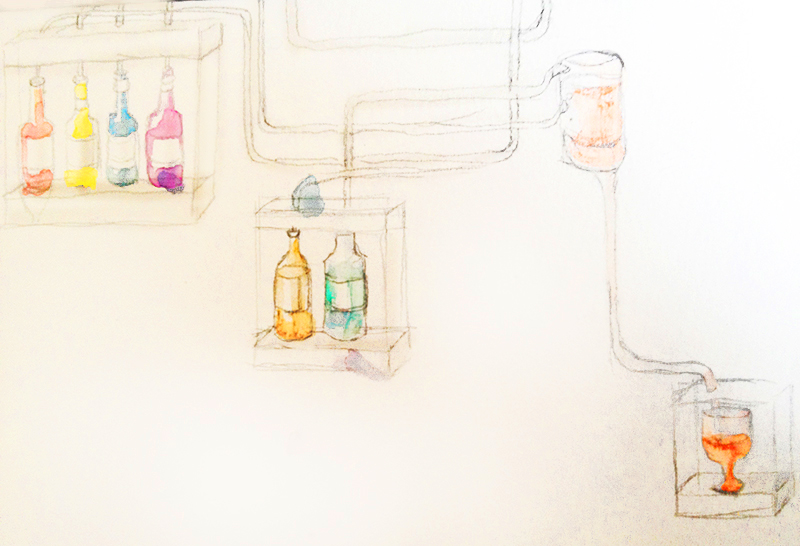
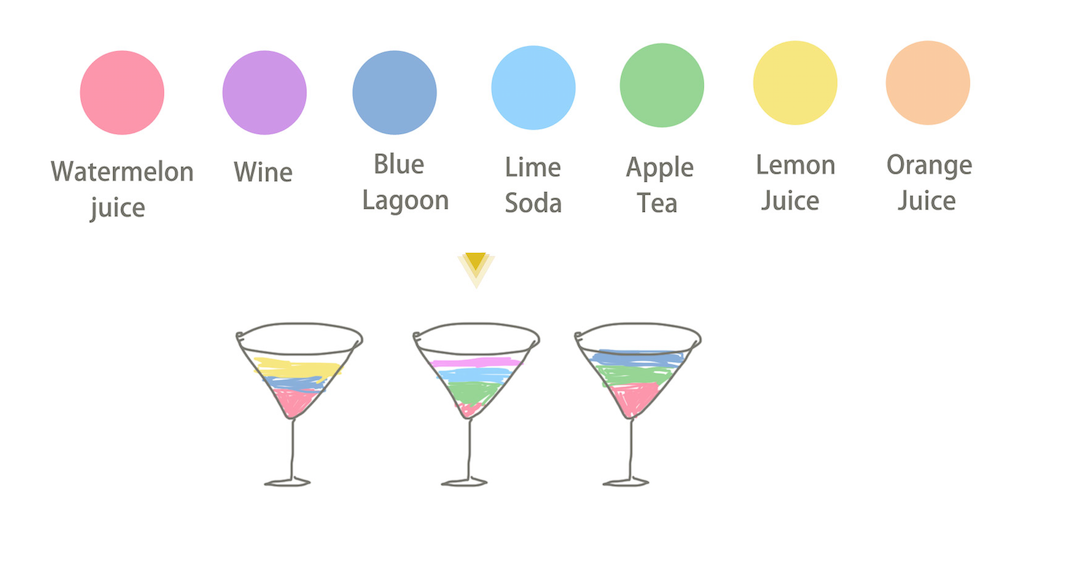
Drink your painting "What is it”?  -Mapping your drawing to different kinds of  drinks, and then make an Alcoholic beverages for you.

In this project , we want to make a cup of alcohol beverage by mixing the proportionate colors drinks according to the paintings in real time so as to offer a new way to appreciate audiences' painting’s connotation. Different flavors in drinks may present people's different feeling and may offer people totally different experiences to their own paintings.

color副本2


982A037C-9FE9-44BA-AFE6-9DF69F3C4B70

How did you become interested in it? -I like painting through I was a little child, I want to explore peoples ' feelings when they are drawing, and how different organs’ generate different feelings when facing the same thing. We usually  think red is enthusiasm, and most people think apple juice taste enthusiasm and full of energy too,  when we change the color in paintings to drinks, how is it taste, will we have the same emotional experience or same feelings?  We want to explore it and choose this project.

Who is the audience?  fans of art,artist,technologist, visitors of the Art gallery. Bartender.

Function of the processing Part

Processing is used as the input part. There are three functions in Processing.

  1. Painting System
  2. Analyze the colors’ values and saturate&brightness levels to Arduino
  3. Provide data visualization of the painting after audience drawing their painting,and show what their drinks made of

 About Painting System

There are three plans to make Painting system (we hope provide more colors and brush size because these kinds of variable can express audience’ own awareness and personality. And we don’t want to make the mapping directly. Anyway, still need to keep it simple and stupid.)

 PlanA (Water color painting. the most simple one)

 Rough sketch!

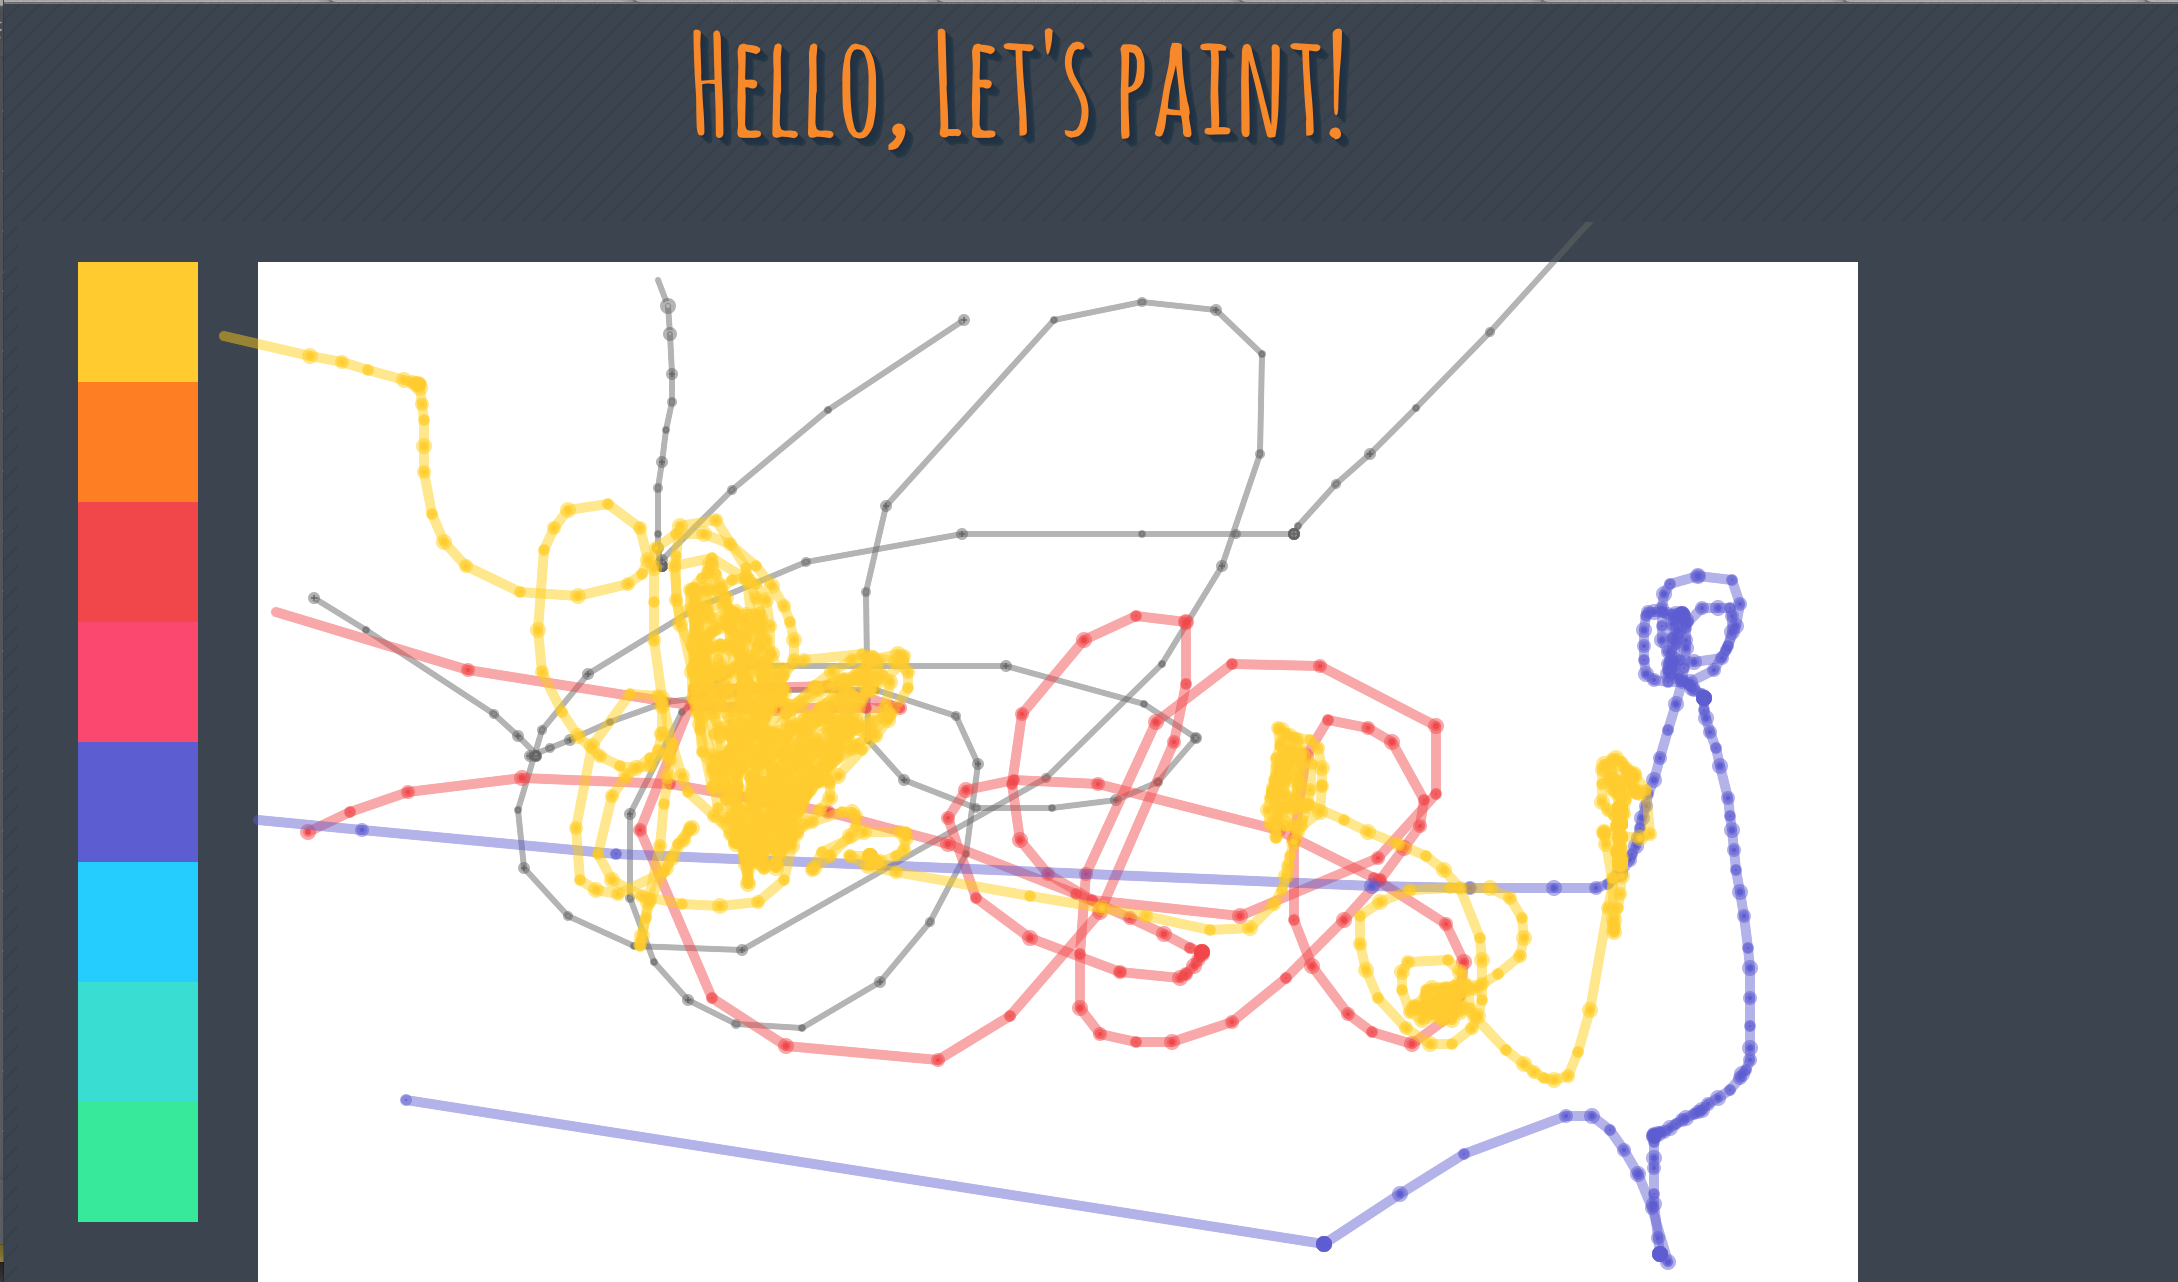
A sketch to draw in watercolor. I have made a fundamental sketch, and need to change the brush to water color version. Using touch screen. I don’t want to add brush size button and  Palettes the screen because it usually make drawing difficultly, users will spend time on how to draw it and what these buttons for. So I just provide some specific colors to audience.

color4

 PlanB (Water color painting.Use soft screen to reflect different force the user use)


Use a soft fabric and a projector to make up as screen which can changed depth according to user’s force. It can change brush’s size and color according to user’s force. (more color more size and more difficult to develop).  Using kinect under the soft screen to detect depth changed.

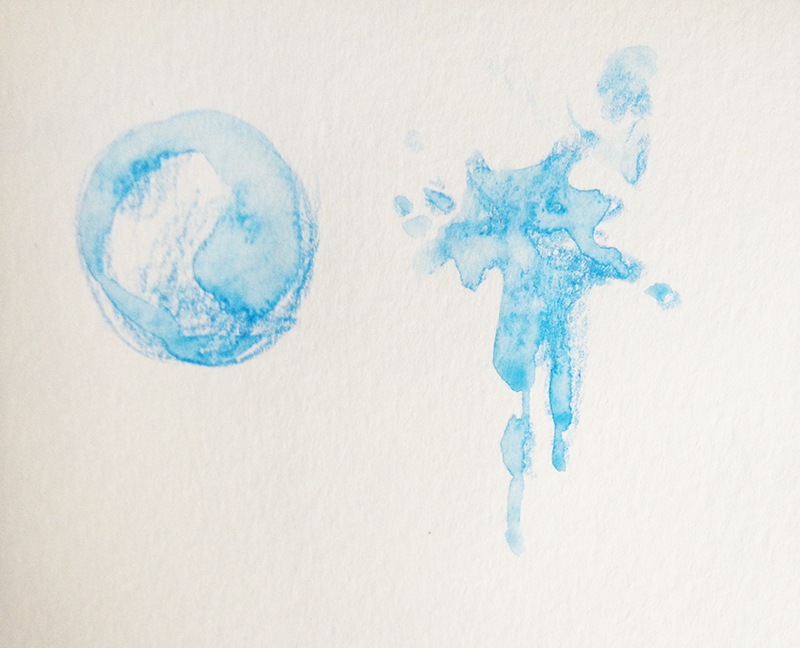
 PlanC (Splash-ink painting)

Creating a lot of colorful pigment balloon on the screen (ballon full of pigment) . use projector to project the screen on the wall. People use darts to shoot the ballon image on the wall(there will be a camera to detect if there is something overlay the ballon image), the ballon which been shoot will  burst and leave a piece of color on the screen.

color5

color3color2


team member: JinShan

Find more proposal about our project --Jin's Post


Comment
141.jpg

Week2- Intro to Fabrication

November 07, 2014 in Intro to Fabrication

05 This week , we learned different kinds of Jigs, tools to help you make your work efficiently and in high quality.

For our assignment, we should make multiples of something, 5 or more.  The objects must be a multi-process piece.

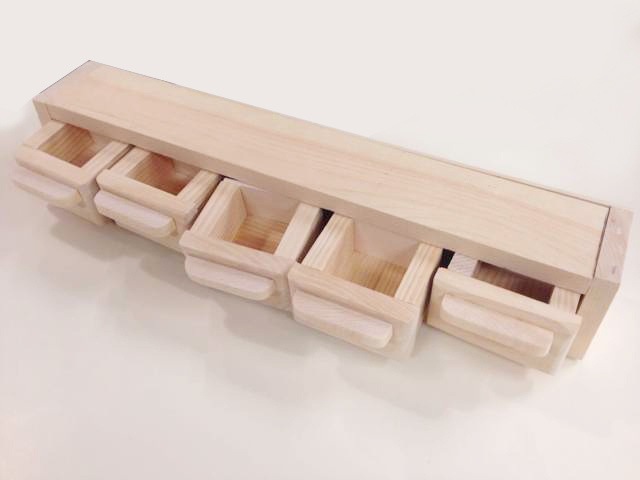
I wanted to make multiple drawers, just like the Traditional Chinese medicine container. It's small but can keep different tiny things being orderly. Just like the picture.

4d23be5cbf8a7aa917636e06c81b_800_799 spices and herbs in wooden box

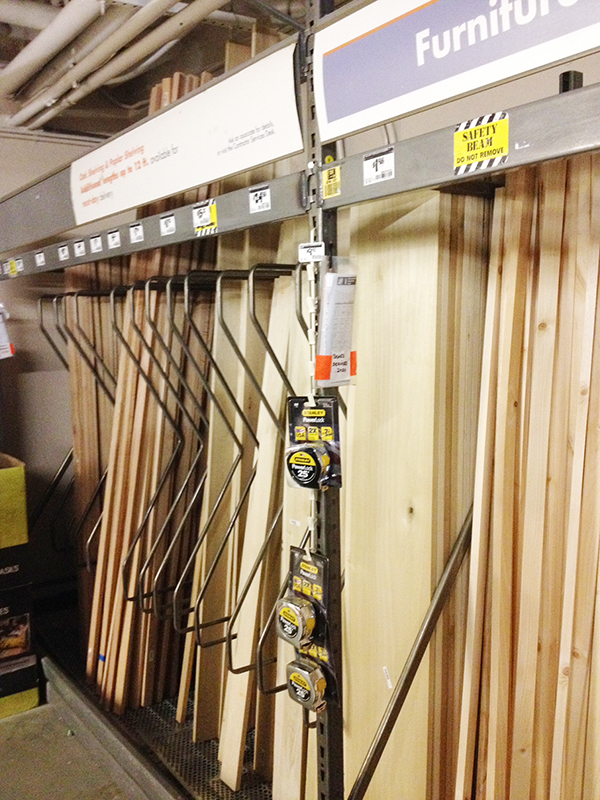
I went to Home Depot on 23th street to buy the wood materials I need.

0 1

BOM

I bought two pieces of big wood board in Home deposit.

3.5*0.75*60 -

2.5*0.75*60

And two thin wood board , one medium wood board from Blick.

4*0.2*24

3*0.5*24 (two)

Then I bought 1/4 Dowel Pin from M&D Shapiro Hardware

First, I made a sketch for my drawer,It was difficult than I thought before, since I haven't make a furniture before, even haven't do something with woods, what's  more, I bought wood material before I designed it. So it spent me a long time to design this sketch to make use of my material (In order to cut less, I made use of material's width to make this size of drawer, next time designed before buying material will be better.)

This is my draft. I bought 4 size wood board, I put serial number to each size of wood. And i noted when I will use each of them in writing their number. It's really helpful, cause drawing draft almost make me crazy....

2

Second, I saw the small piece of wood according to the sketch using band saw. and saw the long piece of wood on saw machine.

8

The difficult part of making a drawer is you should make  parallel things in same size, so I then use the previous one as a stop block , In this way I can  make this two pieces of wood in same size and style.

9

Third, I use rounder machine and sanding-paper to make the it more elegant.

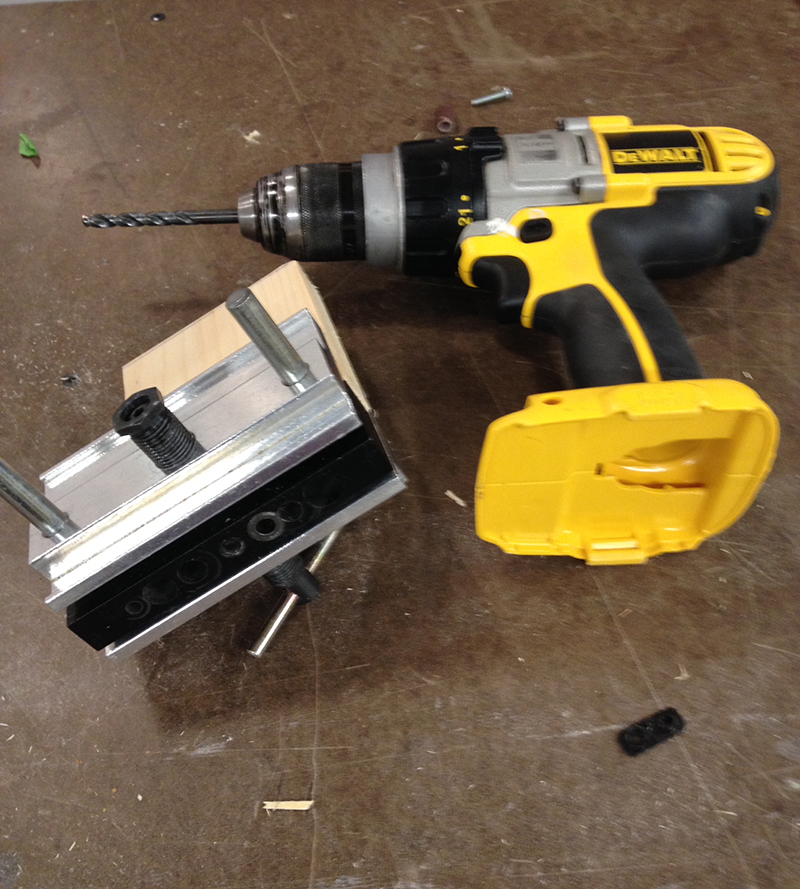
Fourth, arrange all these small pieces of wood. I used dowel jig to make two holes for each piece(the container) ,and then used dowel bits to connect two part together. Then used wood glue to attach 5 inner containers(the drawer)


4

6 5 18


Here is my Drawer!

15  17 12  10


Finally, I add  small stick on each of them to make its handle.

0201 03 04

-1 Comments
24.jpg

Week2 Assignment- Network Media

November 04, 2014 in Network Media

My webpage is here!  

屏幕截图 2014-11-05 07.45.58

Comment
25.jpg

Data-ICM Class8 Assignment

November 04, 2014 in Intro to Computational media

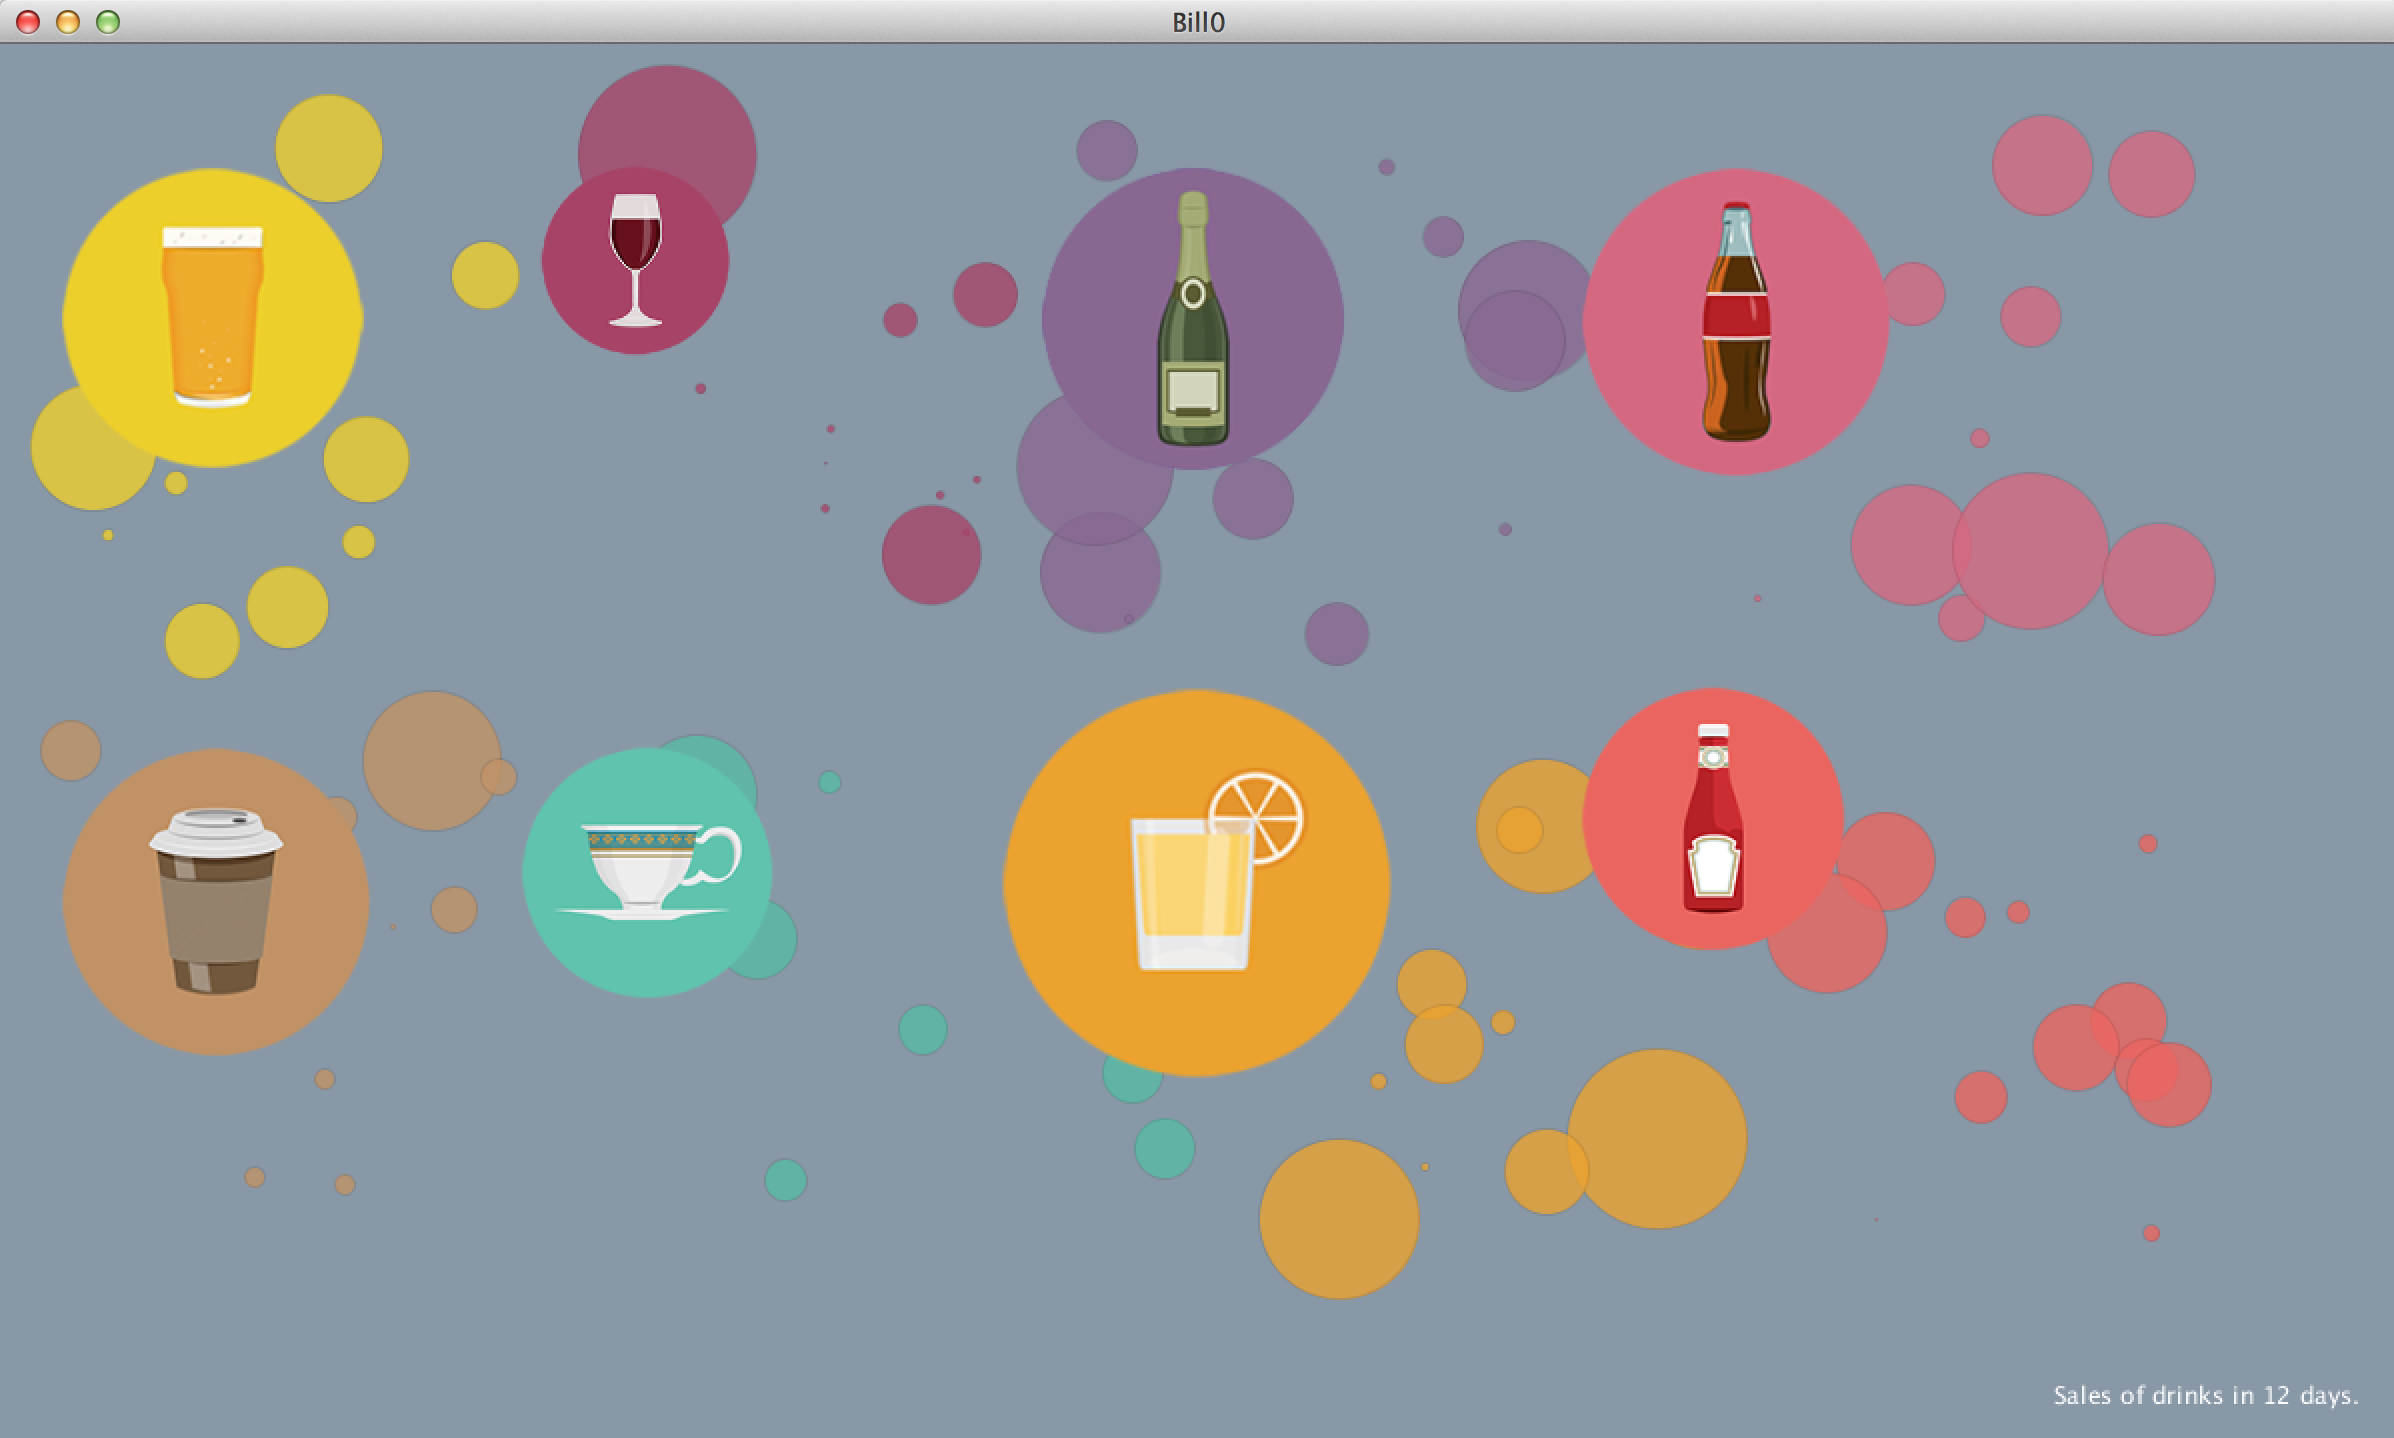
This week 's assignment is about Data, I learned strings, how to calculate words,  how to load data from XML, JSON,Table to Processing. I tried to connect with some API but failed... So this sketch just load table (file in .CSV). I used data (sales of drinks in 12 days) in processing, and visualized date in order to make it more readable. And calculated average sales of each brand of drinks, changed drinks image's size according to if it is popular.(popular one is bigger). It's unfinished, still a lot of things should be improved. I'll try to wrote each drink in individual class, then it can be show the pic of drinks when the mouse move over it.

屏幕截图 2014-11-04 10.49.37


Tags: Data
Comment
26.jpg

Flashlight--Class1 Assignment of Intro to Fabrication

October 31, 2014 in Intro to Fabrication

5 This week, we should build a flashlight. I go to  Lighting Plus at first to see if I can buy the bulb, but I found all the bulb need 120V, and cannot work portable with cell battery. So I give up to make a bright bright flashlight... I chose LED to make my flashlight.

Then I go to Canal plastic center to buy some acrylic material which I can use to make the body of my flashlight. There are a lot of acrylic in the shop,I bought a pink tube and a transparent cube. I want to make a bling-bling  fairy stick!

9 8

0

I  used wires, one cell battery, one switch, one LED, an acrylic tube and an acrylic cube to make it.

First, soldering wires and assemble the circuit.

2-2 2

1

2. Using Router machine  one angle of the acrylic to be flat in order it to attach  with the tube closely.

3. Add the LED

I like the feeling of using drill press, not as scary as I thought before. Now I can get comfortable to use it . I drilled a small hole in my acrylic . At first I want to make a bigger Drill Bit to make a larger hole which can put in my blue LED. But I'm afraid to make my acrylic box broken, so then I turned to use a small  red LED which fit in the hole perfectly, but the light is not perfect, it's a little bit dim.

4 3


It will light in the dark environment.

5 7 6


Tags: Acrylic, Light
Comment
Prev / Next

  • Assistive Technology (1)
  • Conversation and Computation (1)
  • Data Arts (1)
  • Design for Seniors (1)
  • Understanding Networks (1)
  • Application (2)
  • Hacking the browser (2)
  • Network Sensor For Develo (2)
  • Spring2015 (2)
  • Always On Always Connected (3)
  • Puppets (3)
  • Designing for Data Person (4)
  • Digital Fabrication For Arcade Design (4)
  • Live Web (4)
  • Network Media (5)
  • Intro to Fabrication (6)
  • Intro to Physical Computing (8)
  • Intro to Computational media (12)